Adding Snowflake Data Warehouses
A Snowflake data warehouse is a cloud-based data warehouse that contains the tables and views that you want to access as model facts and dimensions. It also contains aggregate-table instances that either you or the AtScale engine creates in a schema that you specify.
Prerequisites
To add data warehouses, you must have the datawarehouses_admin or datawarehouses_manage realm role assigned in the Identity Broker.
Additionally, you must know the schema to use for building aggregate tables in the data warehouse. AtScale reads and writes aggregate data to this schema, so the AtScale service account user must have ALL privileges for it. BI tool user accounts should not have the select permission.
Procedure
AtScale does not support impersonation for Snowflake data warehouses. When adding a Snowflake data warehouse, do not select the Enable to impersonate the client when connecting to data warehouse option.
-
In Design Center, open the Datasources panel.
-
Click the + icon and select Snowflake.
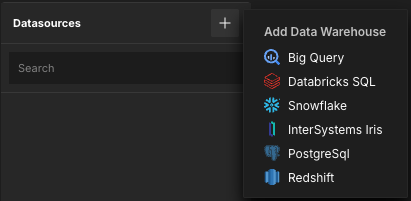
The Add Data Warehouse panel opens.
-
Enter a unique Name for the data warehouse. AtScale displays this name in the Design Center and uses it in log files.
-
Enter the External connection ID for the data warehouse. You can optionally enable the Override generated value? toggle to default this value to the name of the data warehouse.
-
Enter the name of the Aggregate Database, which AtScale uses when creating aggregate tables. You must create this; AtScale does not create one automatically.
-
Enter the name of the Aggregate Schema for AtScale to use when creating aggregate tables. You must create this schema; AtScale does not create one automatically.
-
In the Access Controls section, add the users and groups that you want to be able to access the data warehouse and its data. For more information on how data warehouse security works in AtScale, see Data Warehouse Security.
-
Add a connection to the data warehouse. You must have at least one defined to finish adding the data warehouse.
-
In the Connections section, click Connection Required. The Add Connection panel opens.
-
Complete the following fields:
- Name: A unique name for the connection.
- Snowflake data warehouse name: The full name of the data warehouse.
- Host: The full name of your Snowflake account.
-
In the Authentication section, in the Authentication Method field, select the authentication method AtScale will use when connecting to the data warehouse, then specify the required credentials.
-
(Optional) In the Additional Settings section, specify any extra JDBC flags only if you are certain that they are required.
-
Click Test connection to test the connection.
-
Click Add.
The connection is added to the data warehouse. You can add more connections as needed.
-
-
(Optional) If your data warehouse has multiple connections, you can configure their query mappings. This determines which types of queries are permitted per connection. A query role can be assigned to only one connection at a time.
In the Query Mapping section, select the connection you want to assign to each type of query:
- Small Interactive Queries: Small user queries. These are usually BI queries that can be optimized by AtScale aggregates or ones that involve low-cardinality dimensions.
- Large Interactive Queries: Large user queries. These are usually BI queries involving full scans of the raw fact table or ones that involve high-cardinality dimensions.
- Aggregate Build Queries: Queries made when building aggregate tables. This mapping should be assigned to a connection that has more compute power, and that is not subject to resource limitations that would prevent it from building aggregate tables.
- System Queries: AtScale system processing, such as running aggregate maintenance jobs and querying system statistics.
-
Click Save Data Warehouse.
Configuring aggregate table names
By default, AtScale creates aggregate tables on Snowflake with quoted lowercase table names. To configure AtScale to create aggregate table names in uppercase, set the aggregate.snowflake.table.names.uppercase global setting to True.
Restart the AtScale engine for your changes to take effect. You can do this through your cluster.
For more information on changing global settings, see Configuring Global Settings.
Additional information
For additional information on what you can do with AtScale and Snowflake, see the following videos: